Studio
-
Zombie Goggles


Some samples of various steps involved in the process.
Recently I was asked how these goggles (from Advice for Young Executives) were made. I said I would provide some kind of information on here about them. I used to teach, so I habitually go into excessive detail about whatever the topic might be. But I'll try to keep this as simple as possible.
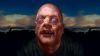
These goggles were inspired by a prosthetic makeup concept from "Night of the Living Dead" (the 90's remake - Makeup by Everett Burrell). The idea was that the zombies were given this 'dead eye' appearance by giving the actors prosthetic eyes and goggles instead of using their own eyes and contact lenses. I thought it would be interesting to explore this idea.
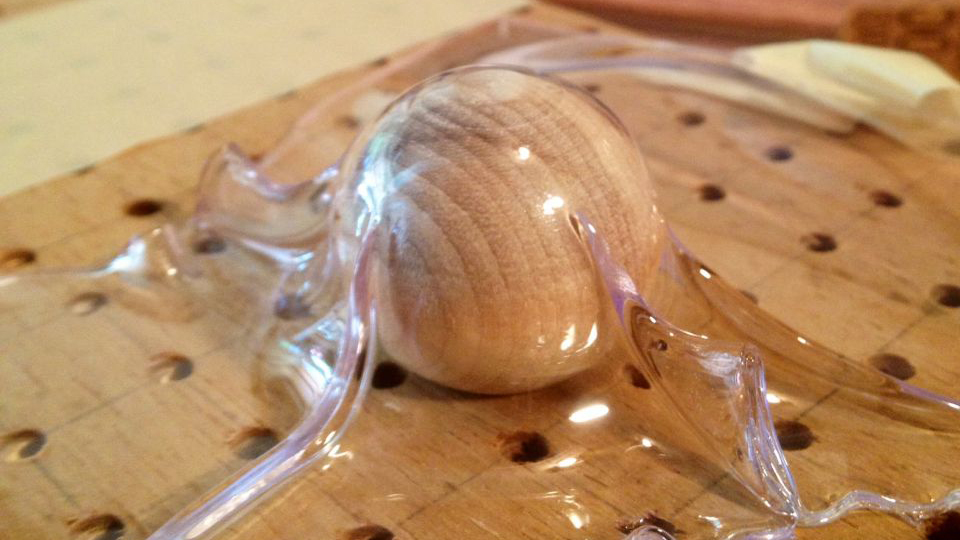
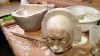
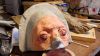
I wanted to make goggles that you could see through. So I started with vacuforming (vacuum forming) thin Plexiglas sheets over wooden balls (1-inch diameter - roughly the size of an adult human eye). Then I began painting these forms (corneas) from the inside out. I picked up on this idea from Dan Rebert a long time ago. Since these are supposed to look like they are decomposing, I decided I'd go with a textured appearance. Incorporating a higher percentage of acrylic matte medium gives the paint job a layered, milky appearance.
In one image, you might see markings with a sharpie. These markings are guides that help determine where to paint. These markings are on the outside of the eye. They are easily removed with denatured alcohol. After the inside of the eye is painted with acrylics, the interiors can be coated with epoxy or envirotex. It's essential to avoid the iris if you plan to try and see out of these things.
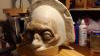
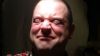
Next, a lifecast duplicate is made with the goggles in place so that a prosthetic sculpture can be made to fit over the goggles. The attempt again here is to achieve a deadened facial (lack of) expression.
It should be noted that the objects described here are not contact-lenses and should never be considered as such. Making contact-lenses is a special and unique process unto itself. You should never attempt to create and apply your own custom made contact lenses unless you are a certified and licensed professional. To learn more about hand-painted, custom contact-lenses, research the work of Cristina Patterson.
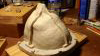
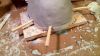
2013.10.09 - sculpture for prosthetic is roughed in. Then form for flexible mold is sculpted over it. Jacket mold is then made.
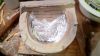
2013.10.10 - some jacket mold images.
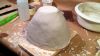
I included some images that describe some aspects of engineering a flexible mold. It's essential to create a facsimile of what the final flexible material (in this case, TC-5050 Platinum Silicone) will become and then prepare a casing in which for it to exist. This silicone is relatively rigid (it's like a vulcanized rubber car tire), so I am experimenting with using a little less material than usual. The mold will be about .25 inches thick, whereas I have been making some molds with this material a little thicker (3/8 of an inch). There are ridges along the side to reinforce the form and keep it from trapping air. There are keys on the side to help register the flexible mold against the jacket. There are also slots sculpted so the mold can be easily pried apart during the initial demolding process. Popsicle sticks are shoved into the slots, one after the other, and eventually, the mold begins to separate. It's essential to avoid breaking the mold.
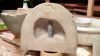
The flat part of the jacket (also known as the "mother mold") is an idea I stole from the master, Dick Smith. Forming one side of a bowl mold like this makes working with it much more manageable during casting. This area is also going to become a spout for acceptance of mold making silicone. The back of the positive contains a handle (another Dick Smith idea), which makes casting and demolding a much smoother process. Raphael Cordero uses tin foil to separate elements when making molds of this type. I've heard of people doing this when making teeth, so I tried it out, and it works much better than saran wrap.
Ralph Cordero's molds are incredible. His sculptures are cool too! Another great source of mold making inspiration is Carl Lyon. His molds are works of art unto themselves. These days, whenever I plan out making a mold, I often think about his molds and wonder how he would engineer them. They are amazing. He's also an incredible sculptor.
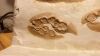
2013.10.19 - adding some more thin appliances before mold making. This other photo shows a cool technique where you melt the clay with a heat gun and sculpt the rotten parts with a can of compressed air.
2014.04.05 - An initial experiment involved Michael Davey's watermelon vinyl, a non-toxic water-based vinyl. It's interesting, but it does move like a garbage bag. I scrapped that idea and went with the "Super Baldeez" vinyl, thinned with alcohol. This one came out almost perfectly. It's a bit translucent, but OK for the purposes I am using it for. The silicone is called DragonSkin, from Smooth-On. It has a plasticizer called Slacker. You can get many pigments for the silicone, and it's easy to use the system. With platinum silicones, you have to make sure you're not incorporating anything into the process that will cause a silicone's failure to cure, such as tin silicones, sulfur clay (those are the main ones). Other impurities can get in the way sometimes.
2014.10.02 - Shot video with prosthetic and other elements. Multiple camera angles. Advice for Young Executives: a Public Service AnnouncementPost a question or comment.
Tom Estlack | Subscribe
 -


-
Search - Studio
Categories
Chronology
-
..............................