Studio
-
Application and Removal of Gelatin Prosthetics
Click here to jump to various sections: Section 1: Intro and Materials, Section 2: Application, Section 3: Blending Seams, Section 4: Sealing the Makeup, Section 5: Color and Painting, Section 6: Unifying the Design, Section 7: Balancing the Composition, Section 8: References, Section 9: Accenting and Creating Dominance, Section 10: Conclusion, Section 11: Removal. The video is transcribed below, so If you miss something or are curious how something might be spelled, you can scroll below to find out.
Thanks for stopping by. This demo is a follow-up to a prosthetic makeup workshop. Here, you will find a tutorial on applying, color, and removing prosthetic gelatin makeup appliances using professional special effects (SFX) materials. There are numerous places on the internet where you can learn how to do this. I would recommend the following books and other resources. Although this list isn't complete, the omission doesn't imply that I would recommend a resource or not. Use your judgment. Safety always comes first. Always make sure you have practice using the materials you might be applying to your skin or someone else.
These resources have been helpful to me in learning about prosthetic makeup fabrication and application.
Dick Smith’s Do it Yourself Monster Makeup Handbook
Author: Dick Smith
Grande Illusions
Author: Tom Savini
Special Makeup Effects for Stage and Screen
Author: Todd Debreceni
Section 1: Intro and Materials
First, we're going to apply prosthetic adhesive to the inside of the prosthetic piece. These have been pre-glued with pros-aide and powdered. Pre-gluing is a time-saver so that when you do prosthetic makeup on somebody, you can figure out where you want these to go and then apply them to someone's face. You do not want to embark on a prosthetic makeup application without making sure you have enough adhesive remover. Nothing takes this stuff off except a decent professional adhesive remover. This stuff works pretty well. It's called Super Solv. The prosthetic will not remove with soap and water. Don't even try applying a prosthetic unless you have maybe a couple of bottles of this stuff sitting around. Super Solv can be bought at the same place where you might have found this (pros-aide). This remover is from Alcone, and you can probably get this at Alcone also, so just kind of a precaution if you glue this to somebody's face, and you don't have this to remove it, they're not going to be your friend for very long, so make sure you have this stuff around.
Section 2: Application
The position of the appliance is being adjusted right now. The adhesive is being applied to the skin, and that will be allowed to dry. It'll then be powdered so that every surface will be glued and then dried and then powdered.Then the appliance will be put in the position and then activated with alcohol. Everything is glued and powdered. You can place it and remove it, and right now, I'm just trying to get it into position, and I have some alcohol in the brush, and once that is on the brush, you can spread it between the appliance and your skin. Be careful because you can get it anywhere, and you have to be careful around your eyes and right now, you brush on the alcohol, and it will dissolve the dry pros-aide. As the glue dissolves, it sets back into place, and then it'll fix the appliance where you wanted it to be glued down. You have to order the 99% isopropyl alcohol, usually from the same places you would get the other materials. I did see 99% percent alcohol at the pharmacist one time, so you might be able to ask the pharmacist if they carry it, but I've rarely seen it at a retail store. It usually has to be ordered.
Section 3: Blending Seams
Right now, I'm blending some gelatin seems with witch-hazel and a Q-tip. Witch-hazel will dissolve the seams of the gelatin appliance. I have a mixed material called Bondo. Bondo is a mixture of Cabo-sil and pros-aide prosthetic adhesive. It's like a patch sealer. It's like spackling compound for appliances that you know if you have stubborn seams then you can kind of blend them in with this material and then once it dries and you have a seam that's blended nicely. You can then blend it with 99% alcohol. The slang name for this material is Bondo. A lot of makeup people call it that. Some people call it Cabo-patch. I'm brushing with alcohol to smooth out the patched material and then some seams. If it's your first time using this material, I'd recommend buying the already pre-made Cabo Patch or Bondo material. I wouldn't purchase the stuff that comes as Cabo-Sil (fumed silica) and then mix it with pros-aide yourself because the Cabo-Sil becomes airborne, and it's a respiratory hazard. So if you've never worked with Bondo material before, get the pre-made material.
Section 4: Sealing the Makeup
Right now, I have a bottle of green marble sealer. The green marble sealer is diluted with 99 percent alcohol. It's going to be sprayed onto the appliances, and some areas are around my face. The makeup absorbs at a different rate on the skin versus the prosthetic. You want the prosthetic piece and your skin to absorb pigment at the same rate. It's noticeable when you colorize a makeup, so the trick is you have to seal it somehow. "Green Marble Sealer" is excellent for this.
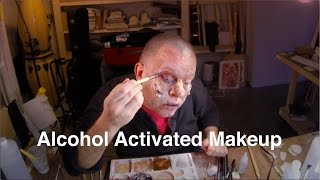
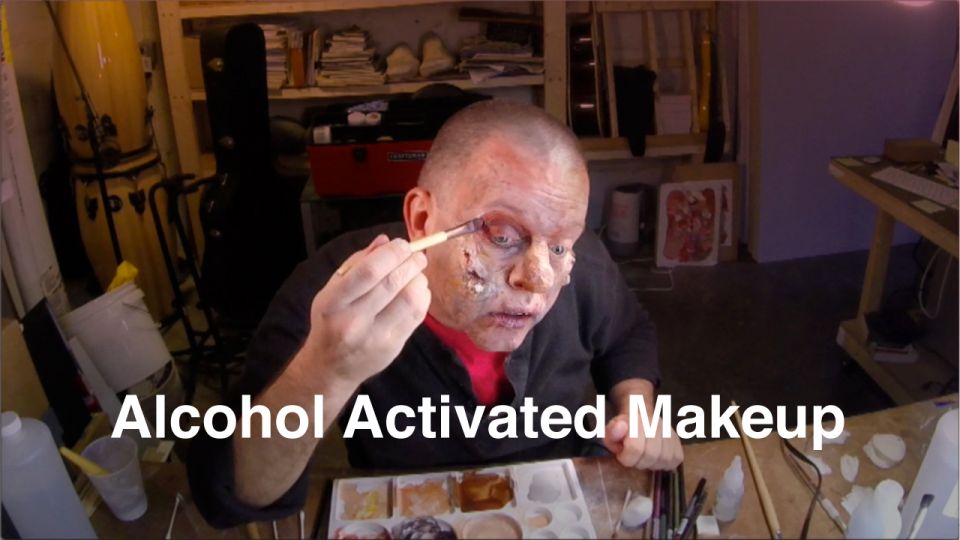
Section 5: Color and Painting
I'm ready to start in with some color, so I'm using these sta-color palettes. These are alcohol activated makeup palettes. You dribble 99% percent alcohol into these troughs, and they act like watercolors. They're very versatile, and there's a lot of elegant effects that you can get with them, and you can paint with them relatively quickly. You can even mix in some of the sealer with them, and you can build layers with them so that the next layer of paint doesn't become reactivated by the other layers of paint that you might put on top. So there's a lot of things you can do with the alcohol activated makeup palettes. There are all kinds. Sta-color palettes are reasonably priced. They can be airbrushed. A lot of people do that. The goal here is that you're trying to get the appliance to blend with the rest of your skin and the rest of your face, and hopefully, if you blended, the seems well enough, then it'll look like the appliance is a part of the rest your face. The objective now is to try and use what colors you have on your face to end blend them with the appliance to get a character to emerge.
Section 6: Unifying the Design
Now, it becomes a 2D makeup process. You want to bring a lot of color variation into what you're doing because even if you're making a dead looking character, you want there to be some life happening. I wanted to get a cracked lip effect here. So I puckered my lip and dabbed some makeup, so it took on the natural wrinkles that existed in my lower lip there. You can see that the appliances are yellowish and lighter than the rest of the face, so I'm going to distract from the color difference between the appliance and the rest of my face.
Section 7: Balancing the Composition
Some of those areas got a little too dark. So, I'm brushing over some of those areas to soften the effect. The veins that occur on the temple became too high in contrast, so I'm diminishing the contrast slightly. You can do a lot by mixing quite a lot of alcohol into the makeup and allowing it to pool into some of the textured areas of the appliance. You can attain some interesting textures in the makeup. I'm trying to create sort of a sunburn looking effect by mixing some complimentary colors. I'm bringing together a greenish color with a burnt sienna reddish color and mixing to varying degrees. You can get varieties of spotty brownish-red, and by going back and forth between these colors, you can vary the tonalities.
Section 8: References
You want to try and be observant of the colors that occur in the natural world. If you study people's faces and try to look at what the colors that occur in people's faces look like, you'll discover that there's a broad array of different hues and tones that are happening. Even if you look at your face in different lighting, like in sunlight or the lighting that occurs at dusk or when you're next to something brightly colored, you'll see that many different colors emerge. You want to try and bring those into the mix as well.
Section 9: Accenting and Creating Dominance
I'm trying to darken the eyelid to make things stand out a little more. There's so much activity in this makeup that I needed to accentuate some dominant features on the face. Creating dominance in the eyes helped balance a sense of compositional dynamism, which was missing previously. The makeup looks like I have leprosy or some skin disease, and maybe I've been out in the sun too long. The makeup here was improvised. Therefore, I didn't have a look in mind when I started. So, I'm making things up as I go.
Section 10: Conclusion
I'm showing you how well this stuff sticks to your face. If I were going to go the "whole nine yards," I would have included some color on the neck in the ears to bring about a more convincing makeup.
Section 11: Removal
So next, I'm going to show you what it's like getting the makeup off, and if you've sealed the appliances and blend off the edges well, then you might have some considerable difficulty finding an edge to start working from. You want to remove as much of the piece as possible and try and get the glue off your skin. It's a little bit tedious, but you'll find that you can do it if you're patient, and the Super Solv is the key to that. One came off pretty quickly. If you consume alcohol, this stuff will be much more difficult to remove from your face. That's not just if you drink, but if you have been taking cold medicine or anything like that, then remember that the alcohol causes the glue to adhere better to your skin. That's one of the reasons that it's used as an agent in applying prosthetic makeups. It will be much more difficult to remove from your skin when you're trying to remove the makeup with the Super Solv. It will take longer than it has to, and you'll have much more difficulty cleaning it off. So you want to be very aware of these issues. If you're going to be working with an actor, it's a good way to practice to start doing this on yourself. You'll know how these materials act and behave so that if you do prosthetic makeup on another person, you have a concept of how the materials act. You'll know what happens when you remove makeup and the degree to which somebody's going to have challenges with the makeup.
For more information on how to create prosthetics, here is an article on making "Zombie Goggles". Here also is a quick post that gets into some of the design aspects and shows you some detailed shots of a witch makeup that is in progress.Post a question or comment.
Tom Estlack | Subscribe
 -
-
Search - Studio
Categories
Chronology
-
..............................